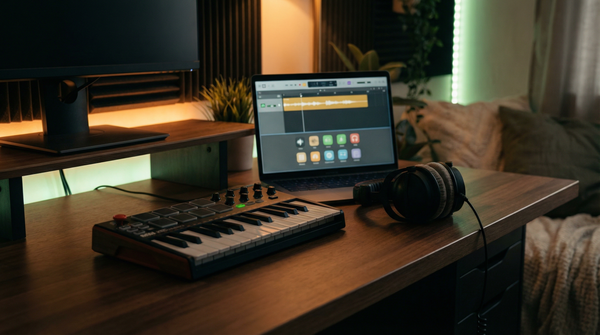
Ableton Live is the DAW of choice for a huge portion of electronic music producers, and for good reason — its clip-based workflow, tight MIDI integration, and powerful native instruments make it one of the best environments for working with MIDI packs. Whether you're pulling chord progressions into Wavetable or running a trap melody through a third-party synth, the process is fast once you know where to look.
This guide walks you through the complete workflow: from creating your first MIDI track to editing, transposing, layering, and using Ableton-specific features that take your MIDI pack usage to the next level. No prior experience with MIDI in Ableton required — just follow each step in order.
If you're new to the concept of MIDI packs altogether, read What Is a MIDI Pack? first. If you want guides for other DAWs, links are at the bottom of this page.
What You Need Before You Start
Before opening Ableton, make sure you have:
- A downloaded MIDI pack (a folder of .mid files — grab a free one here to follow along)
- Ableton Live Intro, Standard, or Suite (any version from Live 10 onward works for this guide)
- At least one instrument — Ableton's built-in synths or a third-party VST
Your MIDI pack files are just .mid files inside a folder. You don't need to install anything. The files live wherever you saved them — your Downloads folder, an external drive, wherever you keep your sounds library.
Step-by-Step: Using MIDI Packs in Ableton Live
Step 1 — Create a MIDI Track
In Ableton Live, go to the top menu and select Create > Insert MIDI Track, or right-click in the empty track area and choose "Insert MIDI Track." A new MIDI track appears in both Session View and Arrangement View. Its color is blue by default, which distinguishes it from audio tracks (orange).
If you're working in Session View (the grid of clips on the left side of your screen), you'll see an empty clip slot column for your new track. If you're in Arrangement View (the timeline view), you'll see an empty horizontal lane. You can work in either — both accept .mid files.
Step 2 — Load an Instrument onto the Track
A MIDI track by itself produces no sound — it needs an instrument to convert the note data into audio. Open the Instruments browser on the left (the plug icon in the left panel), or navigate to Plug-Ins if you want to use a third-party VST.
For a chord progression or melody, consider these native options:
- Wavetable — Ableton's flagship synth, excellent for evolving pads, leads, and lush chords. Great for lo-fi, house, pop.
- Operator — FM synthesis, punchy and versatile. Excellent for plucks, bells, electric pianos, and gritty basslines.
- Analog — Subtractive synthesis modeled on classic hardware. Warm basses, fat leads, retro textures.
- Electric — Electric piano emulation. Perfect for R&B and lo-fi chord progressions.
For drums, use Simpler (load a kick sample into it) or Drum Rack if you want a full kit mapped across pads. Drag your chosen instrument directly onto the MIDI track from the browser panel, or double-click it to load.
Step 3 — Drag the .mid File onto the Track
Open Ableton's built-in Files browser (the folder icon in the left panel) and navigate to the folder where you saved your MIDI pack. You'll see the individual .mid files listed. Alternatively, open your system file browser (Finder on Mac, Explorer on Windows) and drag the .mid file directly from there.
In Session View: drag the .mid file onto any empty clip slot in your MIDI track lane. A green clip appears in that slot, labeled with the filename. Click the play button next to the clip slot to audition it.
In Arrangement View: drag the .mid file onto the MIDI track lane at any point on the timeline. A clip block appears at that position. Press the spacebar to play from there.
You should hear the notes playing through whatever instrument you loaded in Step 2. If you hear nothing, check that the track is not muted (the yellow "M" button on the track header) and that your output routing is correct.
Step 4 — Open the Clip in the MIDI Editor (Piano Roll)
Double-click the green clip to open it in Ableton's MIDI editor, which appears in the bottom panel. This is your Piano Roll — a grid where horizontal bars represent notes, their horizontal position is timing, their vertical position is pitch, and their height is duration.
Along the bottom of the piano roll you'll see velocity bars — thin vertical lines beneath each note showing how hard each note is struck. Taller bars = louder/harder hits.
Take a moment to simply look at the pattern. A chord progression will show multiple notes stacked vertically at each chord hit. A melody will show single notes moving across the grid. A drum pattern will show notes clustered in the lower range of the keyboard (C1 and below is the standard drum mapping zone).
Step 5 — Transpose the MIDI to Your Key
MusicCreator packs come in all 12 keys, so ideally you choose the key that matches your project when you pick the file. But if you need to transpose, it's simple. In the MIDI editor, press Cmd+A (Mac) or Ctrl+A (Windows) to select all notes, then use Shift+Up/Down arrow to move all notes up or down by one semitone at a time.
Alternatively — and this is the cleaner approach for non-destructive work — add a MIDI Effect > Pitch device to the MIDI track by dragging it from the MIDI Effects browser. Set the Pitch knob to however many semitones you need. This leaves the original clip data untouched and can be automated.
Step 6 — Edit Velocity for Expression
In the MIDI editor, click the small arrow or "V" icon at the bottom left of the piano roll to expand the velocity lane. Click any velocity bar and drag it up or down. For a more musical feel, vary the velocities so not every note hits at the same strength — quieter notes on off-beats create a more human, dynamic feel.
To adjust all velocities at once: select all notes (Cmd/Ctrl+A), then drag any velocity bar — all bars scale together proportionally. This is useful when the overall dynamic level needs to be louder or softer relative to another element in your track.
Step 7 — Duplicate the Clip and Layer Different Instruments
One of the most powerful techniques for MIDI packs is layering. Take the same chord progression MIDI file and play it through two or three different instruments simultaneously — for example, a warm pad in Wavetable, a subtle pluck in Operator, and a soft electric piano in Electric. The result is a rich, layered texture that no single preset can achieve.
To do this: duplicate the MIDI track by right-clicking the track header and selecting "Duplicate Track." The new track has a copy of all clips. Change the instrument on the duplicate. Adjust the volume balance between tracks using the track volume fader. Repeat for a third layer if needed.
For variation across sections of your song, duplicate clips within the same track and edit individual notes in each duplicate — adding a note here, changing an ending there — so the second half of the song feels different from the first.
Step 8 — Use Follow Actions for Creative Variation (Session View)
If you're working in Session View, Follow Actions are one of Ableton's most underused features for MIDI pack workflows. Right-click a clip and select "Edit Follow Actions." You can set a clip to automatically jump to the next clip, a random clip, or loop — after a set number of bars.
Load three different chord progression .mid files from your pack into three consecutive clip slots on the same track, set each clip's Follow Action to "Next," and they'll play in sequence. Or set them all to "Any" for unpredictable variation that keeps your Session View performances from sounding static.
Ableton-Specific Tips and Best Practices
Use MIDI Effect Chains for Sound Design
Ableton's MIDI effects — Arpeggiator, Chord, Scale, Random — go between your MIDI clip data and your instrument, transforming the notes before they reach the synth. Drop a Scale effect on a track to force all incoming notes into a specific musical scale, which is a failsafe when experimenting. Add an Arpeggiator to turn a held chord progression into a rolling arpeggio pattern without touching the original clip. Stack these effects for complex transformations — the original .mid file stays untouched.
Simpler for Drum MIDI Packs
For drum MIDI packs (like the Free Drum MIDI Pack), the fastest workflow is to load a Drum Rack and map your samples to the standard GM drum note positions. MusicCreator drum MIDI files follow General MIDI mapping (kick = C1, snare = D1, hi-hat = F#1, etc.), so a properly mapped Drum Rack will play everything correctly on import.
If you're using a single drum sample in Simpler — say, a 808 kick — just load the sample and the MIDI will trigger it at every kick hit in the pattern. Useful for simple, clean drum layering.
Session View vs Arrangement View for Songwriting
The recommended workflow for MIDI packs: start in Session View to audition multiple chord progressions and melodies, trying different combinations until something clicks. Once you've found a structure you like, record it into Arrangement View using the Session Record function (the circle button at the top of the screen). This captures your clip launching decisions as a timeline arrangement, which you can then refine and build on.
Consolidate and Bounce to Audio When Done
Once your MIDI arrangement is locked in, consider bouncing MIDI tracks to audio using Cmd/Ctrl+Shift+F (Freeze) followed by Flatten. This converts the MIDI track to audio, freeing up CPU and preventing accidental edits. You can always unfreeze if you need to make changes later.
Recommended MIDI Packs for Ableton Live
These MusicCreator packs work perfectly with Ableton's instruments — especially Wavetable, Operator, and Electric:
Beautiful Free MIDI Chord Progressions
Free
- Lush, emotive chord progressions across multiple genres
- All 12 keys — drop straight into any Ableton project
- Pairs perfectly with Wavetable pads and Analog basses
Free Drum MIDI Pack
Free
- Drum patterns across genres — hi-hats, kicks, snares, full patterns
- GM-mapped for instant use with Ableton Drum Racks
- Includes trap, hip-hop, and house variations
Pro MIDI Bundle
Best value
- Chord packs + melody packs + drum packs across all major genres
- Thousands of files — a complete creative library for Ableton
- 100% royalty-free
Explore All MIDI Packs
Browse the full MusicCreator library to find packs for your genre — all 100% royalty-free, all 12 keys, compatible with every DAW including Ableton Live:
Other DAW Guides
Frequently Asked Questions
Can I use MIDI packs with third-party VSTs in Ableton Live?
Yes — this is one of Ableton's greatest strengths. Any VST2, VST3, or AU plugin you have installed appears in Ableton's Plug-Ins browser, and you can load it onto a MIDI track just like a native instrument. Simply drag your .mid file onto the track after loading your VST, and the MIDI data drives that plugin. Serum, Omnisphere, Nexus, Spire — they all work seamlessly.
What's the difference between using MIDI packs in Session View vs Arrangement View?
Session View is clip-based and non-linear — ideal for experimenting with MIDI loops, auditioning chord progressions one at a time, or building a set out of interchangeable blocks. Arrangement View is timeline-based like a traditional DAW, which suits songwriting and final arrangement. Most producers start in Session View to find combinations they like, then record those ideas into Arrangement View to build a full track.
How do I change the key of a MIDI file in Ableton?
Open the MIDI clip in the Piano Roll (double-click the clip), select all notes with Cmd/Ctrl+A, then use Shift+Up/Down arrow to transpose by semitones, or Shift+Cmd/Ctrl+Up/Down to move by octave. You can also use the MIDI Effect called Pitch — drop it before the instrument on the same MIDI track — and dial in a semitone offset without touching the clip data at all. The Pitch effect is non-destructive and easy to automate.
Can I layer two MIDI packs — for example a chord progression and a melody — on the same track?
You can layer them on separate MIDI tracks and play them simultaneously, assigning different instruments to each. Within a single track you can also consolidate multiple clips — drag both MIDI clips into the same Arrangement View lane, position them as needed, select them, and use Cmd/Ctrl+J to merge them into one clip. This is useful when a chord progression and bassline need to play on the same instrument.
Do MusicCreator MIDI packs work with Ableton's built-in instruments?
Absolutely. All MusicCreator MIDI files are standard .mid format, and they drive any MIDI-capable instrument — Operator, Analog, Wavetable, Drift, Meld, Electric, Tension, and all the others. The files contain note, velocity, and timing data only; they're instrument-agnostic. You choose the sound, and the MIDI data plays it. This is exactly what makes MIDI packs so flexible compared to audio samples.