This guide is for producers who want to understand MIDI packs at a deeper level — not just how to import a file, but how to edit, layer, transpose, organize, and get the most creative mileage from every pack you own. The principles here apply regardless of whether you're using Ableton Live, FL Studio, Logic Pro, GarageBand, Studio One, Cubase, or any other DAW.
If you've ever wondered why some producers' MIDI pack use sounds polished and original while others sound like unedited presets, this guide answers that question. The difference is almost entirely in how the files are edited and layered — and that's something any producer can learn.
For DAW-specific step-by-step instructions, jump to the relevant guide: Ableton Live, FL Studio, Logic Pro, or GarageBand.
What's Inside a MIDI Pack
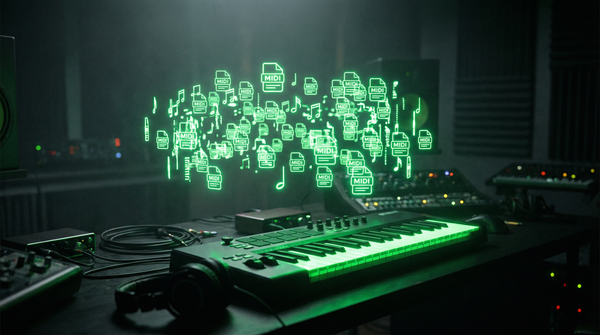
A MIDI pack is a folder of .mid files — standard MIDI files that contain note data, velocity data, timing data, and sometimes tempo information. There is no audio inside a .mid file. Open one in a DAW and it's silent until you assign an instrument to play it.
Most MIDI packs are organized by type. A chord pack contains chord progressions — sequences of two or more notes played together, arranged into musical phrases. A melody pack contains single-note melodic lines. A drum pack contains rhythmic patterns where each note triggers a different drum sound (kick, snare, hi-hat, etc.) according to standard General MIDI mapping.
Quality packs — like those from MusicCreator — are organized in all 12 keys. This means if you're working in G minor, you look for files labeled "Gm" in the filename. No transposition required (though you can always transpose if you want something slightly different). Files are also labeled with tempo, which tells you the BPM the pattern was written at — though you can use MIDI files at any tempo, the rhythmic feel may shift.
When you look at a MusicCreator pack you'll typically find:
- Chord progressions — 4 to 8 bar harmonic phrases, usually two to four chords cycling through a progression. These form the harmonic backbone of a track.
- Melodies — single-note hooks, riffs, or themes that sit above the chord progressions. Usually harmonically matched to work over the same key chords.
- Drum patterns — groove-based rhythmic patterns for kick, snare, hi-hat, and percussion. GM-mapped so they play correctly in any drum rack or sampler with standard mapping.
For a deeper explanation, see What Is a MIDI Pack?
The Universal Workflow
Regardless of your DAW, the workflow for using a MIDI pack follows the same sequence. Every DAW calls things by slightly different names, but the logic is identical.
Step 1 — Create a MIDI/Software Instrument Track
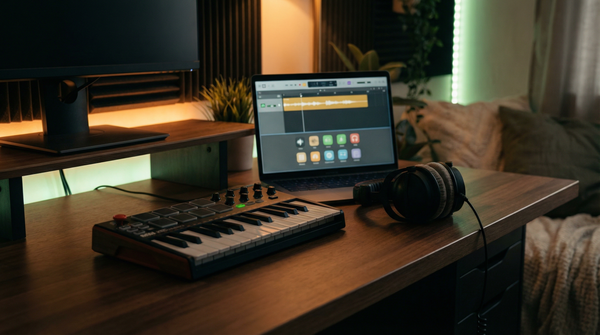
All DAWs have a track type dedicated to MIDI: Ableton calls it a "MIDI Track," FL Studio uses "instrument channels," Logic and GarageBand call it a "Software Instrument Track." This track receives MIDI data and routes it through an instrument plugin to produce sound. Create this track type — not an audio track — before doing anything else.
Step 2 — Load an Instrument
The instrument is the sound source that converts MIDI note data into audio. It can be a soft synth (a plugin that synthesizes sound from scratch), a sampler (a plugin that plays back recorded audio samples pitched to different notes), or a virtual instrument of any kind. Your DAW's built-in instruments work perfectly. Third-party plugins like Serum, Nexus, Kontakt, or Omnisphere work equally well — better, in many cases, due to their broader sound libraries.
Choose an instrument based on the genre and role of the MIDI content. Chord progressions in lo-fi? Load a Rhodes piano emulation or a warm pad. Trap melody? A pluck synth or a pitched 808. House chords? A lush analog-style pad or a stab preset.
Step 3 — Drag the .mid File onto the Track
Every major DAW accepts .mid files via drag and drop from your system file browser (Finder on Mac, Explorer on Windows). Open your MIDI pack folder, find the file you want, and drag it onto the MIDI/Software Instrument track in your DAW. The DAW creates a clip or region containing the note data, and the instrument plays it back immediately when you press play.
If your DAW's file browser is integrated (as in Ableton Live and Logic Pro), you can also use the in-DAW browser to locate and drag MIDI files without leaving the DAW window.
Step 4 — Audition and Choose the Right File
Don't settle on the first file you drop in. MusicCreator packs contain hundreds or thousands of files precisely because different progressions suit different moods, tempos, and genres. Loop the file and switch between different .mid files in the same key, listening for the one that best fits the energy you're going for. This audition step is where experienced producers spend the most time relative to beginners — the investment in finding the right pattern pays off in the quality of the finished track.
Step 5 — Match Keys Across Elements
Before layering multiple MIDI elements — for instance, a chord progression, a melody, and a bassline — verify they're all in the same key. MusicCreator files are named with their key, so "Am_Chord_Prog_01.mid" and "Am_Melody_03.mid" are both in A minor and will work together. If you're using files from different keys, transpose one or more until everything aligns. Mismatched keys are the most common source of "why does this sound wrong" problems.
See What Is a Chord Progression? for more on how keys and chord functions work.
Step 6 — Edit in the Piano Roll
Every DAW has a Piano Roll — a visual editor where MIDI notes appear as bars on a grid. Open it and make at least a few edits to distinguish your use of the pattern from the original file. Even small changes — adding a note on the last beat, removing a repeated chord, adjusting the length of a few notes — shift the pattern toward something that feels authored rather than borrowed.
Editing in the Piano Roll is also where you adapt the pattern to your song structure: a 4-bar progression might need to be 8 bars for your intro, or a 2-bar loop might need a different ending bar to transition into the chorus. Make the pattern serve the song, not the other way around.
Core Editing Techniques
Transposing
Transposing moves all selected notes up or down by a set number of semitones. In most DAWs this is done by selecting all notes in the Piano Roll (Ctrl/Cmd+A) and pressing Shift+Up/Down arrow for semitone movement. Use transposition to change key, to create a higher-register version of a melody, or to shift a bass pattern to fit a new chord root. Transposing up by 12 semitones (or down by 12) moves the pattern up or down by exactly one octave with no change to the intervals.
Velocity Editing
Velocity determines how hard each note is struck — in MIDI terms it's a value from 1 (barely audible) to 127 (maximum loudness). The velocity of each note appears as a bar in the Piano Roll's velocity lane. Varying velocities creates dynamics that make a performance feel human. A chord progression where every note hits at velocity 100 sounds mechanical; the same progression with velocities varying between 60 and 90, with slightly quieter off-beat hits, sounds natural and musical.
As a general principle: downbeats and musically strong beats get higher velocities; upbeats and weaker beats get lower ones. For melodies, shape the velocity to match the phrasing — a rising melodic line often benefits from gradually increasing velocity, mirroring how a singer or instrumentalist would naturally crescendo.
Timing and Quantization
MIDI pack files are typically quantized to the grid — notes land exactly on beats or subdivisions. This is clean, but sometimes too rigid. Most DAWs offer a "humanize" function that adds small random timing offsets to notes, loosening the feel. Subtle humanization (a few milliseconds of drift) makes chord progressions and melodies feel more natural, especially for lo-fi, R&B, and jazz-influenced genres where a laid-back feel is part of the aesthetic.
Conversely, for electronic genres like house or techno where grid-locked precision is part of the style, leave the quantization intact or even re-quantize to a tighter grid if the file feels uneven.
Adding and Removing Notes
Drawing new notes into an existing MIDI pattern is one of the most powerful creative acts in MIDI production. Take a four-bar chord progression and add a melodic fill on bar 4 — a few passing notes that lead into the next repetition. Or remove the last beat of every bar, leaving a brief silence that creates rhythmic anticipation. Small additions and subtractions accumulate into a pattern that sounds distinctively yours.
Removing notes is often underrated. Many producers add without subtracting, resulting in dense, busy arrangements. Try removing every other chord hit from a progression and hear how much space it creates — sometimes less is more effective than the full pattern.
Layering Multiple MIDI Parts
Layering is the technique of assigning the same or related MIDI data to multiple instruments playing simultaneously. A single chord progression becomes a layered texture when it drives a warm pad, a subtle pluck, and a muted piano simultaneously — three complementary sounds creating depth and complexity that no single patch achieves.
The principles of good layering:
- Spread across the frequency spectrum. Don't layer three mid-range pads — combine a low-end element, a mid-range element, and a high-register element. Each occupies different frequencies, so they don't fight each other.
- Use different attack times. A fast-attack pluck and a slow-attack pad on the same chord progression complement each other — the pluck gives attack and definition while the pad provides sustain and body.
- Keep layers at different velocities/volumes. One layer should be dominant; others support it. If all layers are equally loud, the result is noise. A typical balance: lead sound at 0dB, supporting layer 1 at -6dB, supporting layer 2 at -12dB.
- Less is more. Two layers often sound better than five. Add a third or fourth only when it genuinely adds something the first two don't provide.
For drum MIDI packs, layering means stacking sounds. Load your drum MIDI pattern and assign different drum samples to each note trigger — a punchy sample from one pack, a roomy sample from another. Two kick layers (one low-end, one click-focused) add weight and presence that neither achieves alone.
Organizing Your MIDI Library
As your collection of MIDI packs grows, organization becomes a competitive advantage. Producers who can find the right file in 30 seconds maintain creative momentum; those who spend 15 minutes searching break their flow.
A practical folder structure for a MIDI library:
-
/MIDI Library/-
Hip-Hop/Chords/Melodies/Drums/
-
Lo-Fi/(same sub-structure) House/Pop/R&B/-
_Favorites/(a flat folder with your most-used files, no sub-folders)
-
Don't rename the original files — their names usually contain key, BPM, and genre information embedded by the pack creator. Renaming loses that metadata. If you want to mark your favorites, use your OS's tagging or star/rating system, or maintain the _Favorites folder with shortcuts or copies of your go-to files.
When starting a new session, begin by browsing your _Favorites folder for quick starting points. Move to the genre-specific folders when you need more variety or a specific feel.
Using MIDI Packs to Learn Music Theory
This is one of the most underappreciated uses of MIDI packs. Loading a professionally crafted chord progression into your Piano Roll and studying it — really examining which notes form each chord, how the chords relate to each other, why certain progressions create tension while others feel resolved — is an active, musical way to learn harmony.
Niko Kotoulas, a concert pianist with 26+ years of experience, designed MusicCreator's MIDI packs with musicality at their core. The progressions in these packs use genuine harmonic logic — they're not random combinations. When you look at them in the Piano Roll, you're seeing real compositional decisions expressed in note data.
Try this exercise: load a chord progression from a lo-fi pack into your Piano Roll. Identify the root note of each chord. Look at the intervals between the notes in each chord — are they all stacked in thirds? What's the quality of each chord (major, minor, diminished, extended)? How does the progression move — does it stay in one key or borrow chords from other keys? This kind of active analysis teaches theory faster than passive reading, because you're hearing the concepts as you study them.
See What Is a Chord Progression? for a deeper explanation of the harmonic concepts you'll encounter.
Common Mistakes to Avoid
Using Files Unchanged
The most common mistake is dropping a MIDI file into a project and using it exactly as-is, with the default instrument sound and no edits. The result sounds like the pack demo, not like your music. Always make changes — even small ones. Edit at least five notes, adjust velocities, change the ending, add a fill. These small acts of authorship transform a shared resource into something personal.
Ignoring Key Compatibility
Every melodic and harmonic MIDI file has a key. If your chord progression is in C minor and your melody is in D minor, they will sound dissonant — not in a creative way, but in a "something is wrong" way. Always check the keys of every element before stacking them. Use the key labels in filenames (look for "Cm," "Am," "Fmaj," etc.) as a guide, and transpose as needed.
Skipping the Instrument Audition
Loading a chord progression onto the first instrument preset you find and moving on is a missed opportunity. Spend time auditioning different sounds while your MIDI pattern loops. The right instrument transforms a good chord progression into something that fits your track perfectly — the wrong instrument makes the same progression feel out of place regardless of how well the notes are written. Three to five minutes of auditioning sounds saves hours of mixing problems later.
Over-Layering
Adding too many MIDI elements — three chord tracks, two melodies, a counter-melody, a bass, and a drum pattern all playing simultaneously — fills every frequency range and leaves no space for the mix to breathe. Arrangement is as much about what you leave out as what you put in. A groove-based track with a chord pad, a bass, and a drum pattern is often more effective than eight layers competing for attention.
Never Bouncing to Audio
Leaving everything as MIDI means higher CPU load, potential plugin latency issues, and risk of accidental note changes late in the project. Once your MIDI arrangement is locked in, bounce your instrument tracks to audio. This freezes the sound, frees up CPU, and protects against accidental edits. Keep the original MIDI track around (muted) in case you need to revise.
DAW-Specific Guides
For step-by-step instructions tailored to your DAW, including the specific menus, keyboard shortcuts, and native instruments available in each:
Recommended Packs to Start With
If you're starting fresh, here are the best free packs to get hands-on with the concepts in this guide:
Beautiful Free MIDI Chord Progressions
Free
- Emotive, musical progressions across multiple genres
- All 12 keys — ideal for learning key-matching
- Perfect starting point for layering practice
Free Drum MIDI Pack
Free
- Drum patterns across genres — hip-hop, lo-fi, house, trap
- GM-mapped for any drum rack
- Great for learning drum MIDI layering and editing
Niko's Free Memorable MIDI Melodies
Free
- Melodic hooks crafted with 26+ years of musicianship
- Combine with chord progressions to practice layering
- Excellent for studying melody-over-chord relationships
Ready for the full library? Browse by genre:
Frequently Asked Questions
What's the difference between a MIDI pack and a sample pack?
A sample pack contains audio files — pre-rendered sounds (loops, one-shots, vocals) that play back exactly as recorded. A MIDI pack contains note data only — instructions for what notes to play and when, with no audio. You supply the instrument, and the MIDI data drives it. This means MIDI packs are infinitely flexible: the same chord progression can sound like a piano, a synth pad, a string section, or a bass guitar depending on what instrument you load. Sample packs are faster to use but locked in sonically; MIDI packs require one extra step but give you complete control over the sound.
Do I need music theory knowledge to use MIDI packs?
No — you can get great results from MIDI packs without any theory knowledge, which is exactly why they're popular with beginners. You load the file, choose an instrument, and play. However, some basic theory knowledge makes you much more effective: understanding keys helps you pick the right files for your project, knowing chord functions helps you sequence progressions meaningfully, and recognizing intervals helps you transpose intelligently. MIDI packs are also excellent tools for learning theory by studying the patterns in the Piano Roll.
Can I use MIDI packs commercially without paying royalties?
MusicCreator MIDI packs are 100% royalty-free. You can use them in commercial releases, sync licensing, YouTube videos, client work, and any other commercial application without any additional payments or credits required. The one-time purchase price covers all uses. Always check the license terms of any pack you buy — with MusicCreator, you're fully covered from the moment you download.
How do I organize a large MIDI pack library?
The most effective system is a two-level folder hierarchy: top level organized by genre (Hip-Hop, Lo-Fi, House, Pop, R&B), then sub-folders by type (Chords, Melodies, Drums) within each genre. Don't rename the original files — they usually contain key and BPM metadata in the filename. Add frequently used MIDI files to a flat "Favorites" folder you can access immediately at the start of any session, so your most valuable starting points are always within reach.
What are the most common mistakes producers make with MIDI packs?
The biggest mistake is using MIDI pack files completely unchanged — copying a chord progression wholesale into a track without any edits creates something generic. Always make at least a few changes in the Piano Roll. Other common errors: ignoring key compatibility when layering files (always match keys), skipping the instrument audition step (try five sounds before committing to one), over-layering too many elements at once (two or three well-chosen layers beat five competing ones), and never bouncing MIDI to audio once the arrangement is finalized.